Editing a Site Alias

How to edit site aliases (also known as HTTP aliases) that are used by DNN to identify sites when they are accessed by a web or mobile device browserA software application for displaying HTML pages on the World Wide Web. Common browser applications include Microsoft Internet Explorer and Google Chrome.. Restricted to SuperUsers.

  1. Navigate to HostThese users have full access to manage the settings and content of all sites with this DNN installation, including the Host site. SuperUser accounts are created using the Host > SuperUser Accounts module. >  SiteRefers to a single and unique site created using DNN. Multiple unique sites can be created and managed within each installed DNN application. Management and click the Edit  button beside the title of the required site - OR - Navigate to AdminRegistered users who are members of the Administrators role. These users have full access to manage the site including adding, deleting and editing all pages and modules. Administrators also have access to the Admin pages located on the main menu. > SiteRefers to a single and unique site created using DNN. Multiple unique sites can be created and managed within each installed DNN application. Settings.
  2. Select the Advanced Settings tab.
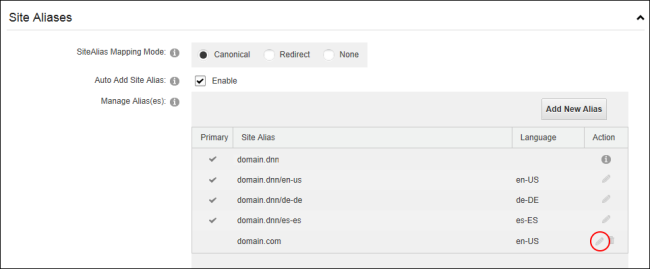
  3. Expand the SiteRefers to a single and unique site created using DNN. Multiple unique sites can be created and managed within each installed DNN application. Aliases section.
  4. Click on the Edit  button to the left of the HTTP Alias to be edited.

  1. Edit one or more fields as required.
  2. Optional. Select the Primary radio button to set this new alias as the primary alias for this site. The default alias is used in conjunction with the SiteRefers to a single and unique site created using DNN. Multiple unique sites can be created and managed within each installed DNN application. Alias Mapping Mode field. When the mode is set to Canonical then the default alias is used as the canonical alias for search engines, however when the mode is set to Redirect then the default alias is used as the permanent redirect.
  3. Click the Save  button.